Wednesday 29 May 2013

Most Wanted for the Month of May

Hello everyone,

Here I am again with another post on my most wanted for this month.  May just flew by so fast and we're entering June already!  Anyway, below are the stuff that made it to my list:


1. Real Techniques Eye Starter Kit - I was happy to find these at Walmart, no need to cross the border... just kidding! I absolutely love these brushes, they're high quality and affordable, this cost me $18.97 for this kit.  It comes in 5 essential eye brushes:  From left to right:

Base Brush - good for cream shadows.
Deluxe Crease Brush - I actually use this for concealer, I find it quite large for my crease.
Eyeliner Brush - this is a little thick for me, however, I use it to put some shadow on my lower lash line.
Brow Brush - good for defining your brows.
Accent/Detail Brush - great for highlighting the inner corner of your eye or smudging on  lower lash line.


2. Revlon Colorstay Ultimate Suede in High heels - the color pay off is quite sheer but it's definitely buildable.  This is great for an everyday look.  Although you can barely notice the shimmer on them.  It's also hydrating and to me it lasts for a couple of hours.  This cost me $10.99.

3. Rimmel ScandalEyes in Bullet Proof Beige - it has a creamy finish so it glides on easily.  I use this own its own or as a base.  For daytime look, I would apply this all over my lid and a Brown eyeshadow in the outer crease.  Finish it up with a mascara.  This cost me $7.99.


4. MAC eyeshadow in Expensive Pink - this is like a coral, pink shade with shimmer.  In my opinion, this is a universal eyeshadow, it looks great in every skin tone and it's a perfect companion for most shades.  This cost me $15.


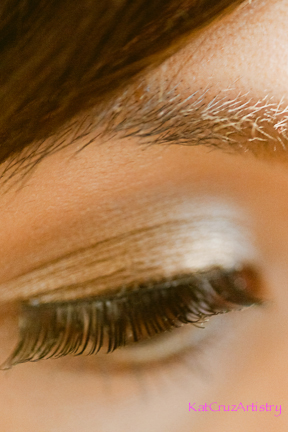
5. MAC PaintPot in Constructivist and MAC Pigment in Antique Gold - I love this combination for an evening look.  MAC Constructivist is a deep brown cream eyeshadow with a tint of shimmer and the MAC Antique Gold is a brown shade of pigment with gold shimmer.  I apply the MAC Constructivist all over my lid, blending the edges and I dab the Antique Gold on top of the Constructivist.  I then line my lower lash line with a black liner and finish it with a mascara.  

The last 2 are my most worn wardrobe:


1. Military Jacket - this is a light weight jacket, great for spring and fall.  This was $40 at Garage.


2. Wedge Sneakers - this is a cross between  high top sneakers and high heels.  This enhance the look of leggings or skinny jeans.  This was $20 at Ardene's.

There you have it! See you next time, KAT


Thursday 23 May 2013

My Journey to Weight Loss

Hello Everyone,

Today I want to steer away from reviewing makeup products, and tutorials and talk about something that most people can relate to which is LOSING WEIGHT.  I want to reach out to people who are struggling to lose weight or people who wants to lose weight but do not think they can.  I hope with what I'm going to say would not offend anybody but to serve an inspiration to most of you.

First of all, when I got married and after having 2 wonderful kids that my body has changed tremendously.  My heaviest was 145 lbs and I stand 5'1", with my height, I was considered obese.   I love shopping and I usually go out with my sister to a mall and we would walk in at a clothing store and see something on a wall or on a mannequin and I would try it on and didn't like what I see, to me, it didn't look right.  I was upset and frustrated for a long time.  So that's when I started to turn to makeup, bags, purses and accessories, everything else but clothes.  A year later, in 2010,  I remember coming out from a camera store and I saw a weight loss program which is JENNY CRAIG that just opened in our area.  I walked in with no hesitations, I didn't know what to expect, all I was thinking of that day that I was desperate to find a solution to my weight problem.  I signed up just to try it out.  To be honest, with the membership and the food that you buy from them, it is not the cheapest, we're talking about $15-20 a day.  I considered it as an investment and I was doing it for the right reasons.  Besides living healthier, I wanted to feel good about myself and not to shy away from shopping for clothes and have that confidence to wear what I want.  Before signing up with the program, I was eating about 2500 calories or more a day with no physical activity and when I joined the program, my calories intake was cut in half, we're talking about 1200 calories a day! I was hurting for awhile and wanted to give up after a month but I pushed myself everyday that I can do it with the help and support from my family and friends.  As a JENNY CRAIG client, I was and still am happy with the program.  I learned a lot from them to eating right, fitness and the consultants are great supporters which I needed to reach my goal weight.  JENNY CRAIG food consist of all portion size regular meals and they're all delicious especially the desserts!

With the amount of food you take in, you have to balance it with a physical activity.  All you need is 30-45 minutes a day.  I know most of you are saying "who has time to work out?, I have a busy life etc".  I was in that state as well, that's how I got to that weight.  I was juggling between being a wife, a mom and having a full time job but I learned that you don't make the time to work out but you have to find the time to work out.  At that time, I chose to work out before everybody wakes up which was from 5:30-6:15 a.m. and I'd be done just in time to make breakfast and get my kids ready for the day.  I work out 4-5 days a week.  All I'm saying, find something that will work for you, choose something that you enjoy whether it's walking, or any physical activities with your kids, just choose something that you can commit to and not think of it as a work out.  Also, make sure you change your work out routine every 3-4 weeks to avoid hitting plateau.  My work out routine from Day 1 consists of walking on the treadmill, playing with my kids, Hip Hop Abs, Body Boot Camp, Kick Boxing, Taebo, Jillian Michaels, Turbo Fire, Tap out and I just started doing Insanity.  I'm not a gym person so I usually buy home videos which works just the same.

Anyway, not everybody can afford weight loss program but it doesn't mean you can't live a healthier life.  I don't think there's such thing as bad food, i think minimizing what you eat is a great way to start, cut your carbs in half, plan your meal, which I find this very important that way you can track your calories intake... TRUST ME, YOU'LL BE SURPRISE! I'm also not saying to cut out all your favorite food such as sweets, savories, etc. just don't over indulge yourself, for instance, if you're craving for a slice of cake, just eat half a slice of a cake.  The key is portion wise.

Nobody said it will be easy, it took a lot of discipline, determination and motivation and a change of lifestyle to reach my goal weight.  It will take time, just do it one day at a time, one pound at a time, you'll get there.  I understand that sometimes we fall off the wagon, it happened to me a few times, we're just human, but make sure you get back on track.  

Overall, I've lost 39 lbs in a span of almost 2 years, I started at 145 lbs and I'm now 106 lbs, I couldn't be happier. My weight still fluctuates every now and then but I manage to get back on track.  I am no expert or a professional dietician, I just want to share what worked for me in losing weight and maybe it will work for you too.  So for all the moms or for the people in general who are in the same situation as me that think you can't do it or you're making random excuses that you can't do it, the only person that can stop you from living healthier is YOU!  


Here's a BEFORE and AFTER photo of me:

  
           BEFORE                             AFTER


Best of Luck, KAT


Monday 20 May 2013

Sonia Kashuk Makeup Brushes and Look of the Day


Target has opened a couple of stores in Winnipeg and one in Brandon which is good news to most people that lives around here.  It sure saved me a few dollars from crossing the border this summer.  So far from what I've seen,  Target in the states has more selections than what we have here unless there's still expanding as it's still relatively new.  But I'm quite satisfied.

Anyway, I did a few of my weekly groceries and stopped by at the Beauty Aisle... I couldn't resist skipping that section! I picked up a couple of the Sonia Kashuk brushes which I'm excited to share with you guys. The one's that I purchased,  I find more use from the bunch.  Also I decided to do a Bronzy, Summer Look using the brushes.


1. Synthetic Flat Top Blusher - the original intent of this brush is use as a blusher but I've used it with my liquid and mineral foundations and it applies perfectly.  This cost me $15 cdn.

2. Duo Fibre Crease Brush 205 - this is a fantastic brush since it's a duo fibre, it does not pick up a lot of product so if you like a softer look or a light dusting of powder on your eye lids, this is good for that.  The angled shape fits well into the crease and in the outer corners.  The quality is great, I've used this with clients and it applies flawlessly.  I've washed it a couple of times and I have not experience any shedding.  This cost me $7.00 cdn.

ON TO THE BRONZY, SUMMER LOOK:


Ingredients: 
L'OREAL Magic BB Cream in medium, 
MAC Pro Sculpting Cream in Pure Sculpture.

Application:
I applied the L'OREAL Magic BB Cream all over my face and applied the MAC Pure Sculpture on the high lights of my face (cheekbones, temples, and just a bit in the outer corner of the bridge of my nose).  Both using the Synthetic Flat Top Blusher.


Ingredients:
Maybelline Color Tattoo in 25 Bad to the Bronze (cream eyeshadow)
MAC PowerSurge Eyeliner

Application:
Using my ring finger, I applied the 25 Bad to the Bronze all over my lid using it as a base and I applied the MAC PowerSurge on my water line.


Ingredients: MAC Woodwinked eyeshadow (labeled as #1 above)

Application: I applied the Woodwinked eyeshadow on top of the Bad to the Bronze cream eyeshadow for the color to pop more using the Sonia Kashuk Duo Fibre Crease Brush 205, to darken the crease a little bit, just dip the pointed edge of the brush on the eyeshadow and lightly apply it on the crease, blend, blend, blend.  Apply your favorite Mascara to the top and bottom lashes to finish the look.


Ingredients: Andrea Mod Lash in 53

Application: You can definitely skip this step, but I wanted to add some false eyelashes.


There you have it, a soft bronzy look for the summer, and a great must have brushes from the Sonia Kashuk line.

See you guys next time, KAT

Thursday 16 May 2013

Beauty Storage

Hello everyone,

I hope you guys are doing great and looking forward to Victoria Day long weekend! This weekend we're having some family over for some barbeque and hopefully enjoy the sun that's if we get to have a peak of it.

Anyway, before I start rambling on and on about another topic, I'll get back in focus of this post.  It's all about BEAUTY STORAGE.  As some of you know me, I have a good collection of makeup and I like to organize them where I could see them because if they're not near my sight then I would completely forget about them.

I found a form of storage where it's classy, fresh and serene with a pull out drawer that is spacious enough to fit in a few partitions to keep it inside to store most of my makeup products in sections.  With a color being White, it blends in with everything I have in my room.  This dressing table is called the MALM Dressing Table from IKEA, this was a Christmas gift from my hubby.


My husband have installed 2 inexpensive fluorescent lights on each side of my mirrors.  They're from Walmart at $14.99 each.  The mirror was from Home Depot, it was on sale when I got it, I believe it was $30.


On the surface of the dressing table, I have decided to put a few things that are on my reach.  On the left hand side, I've kept a couple of clear drawers from Staples given to me by my sister.  This is where I store my powders, blushes, and hair accessories.  On top of that, I have some of my skin care and other essentials that I use on a regular basis.  


Next to it are my makeup brushes, I put them in my Sigma makeup brush cup holder (Left) and 3 clear, plastic boxes from Michaels ($4.99 each) and filled it with vase fillers from Dollarama at $1.00 each.


This is the large pull out drawer, like I mentioned earlier, this a great place to store most of my makeup, the drawer organizers are all from Dollarama which again cost me $1.00 each.  Below is a closer view of what each of them look like:  This is where I keep my lip products


On to Eye products, below is another closer view:


Last but not the least, I had my eye on this for quite a while, it's actually a white book shelf also from IKEA with 3 black, foldable boxes and a hot pink box, just to add a pop of color from Dollarama... can't you tell how much I love Dollarama as well? This is where I store the rest of my beauty goodies, camera accessories, makeup bags, and some of my favorite books.


I hope you guys enjoyed having a little preview of how I keep my stuff as organized as possible and hopefully it gave you some ideas of what to use for storage.

See you guys next time, Kat

Saturday 11 May 2013

Pamper yourself without spending a big bucks

Taking care of your skin is definitely important, it is like brushing your teeth everyday, it needs additional care.  Having a good skin care regime will keep skin looking its best and it will prevent it from common skin problems such as acne, blemishes, signs of aging etc. I had a few skin problems once upon a time and I used too many products on my skin which irritated it even more.  So I eliminated a few products and stuck to the one's I have mentioned below and honestly it improved my skin over time.

Step 1: CLEANSE

Cleansing your skin twice a day (morning and at night) with a mild liquid cleanser.  I use a hand held brush like the Olay Pro-X Advanced Cleansing System with my Olay Pore Minimizing Cleanser and Scrub.  I find this product very refreshing on my skin and cleanse deeply and exfoliate my skin.


Step 2: TONER

Applying a toner removes any residue left behind after cleansing, and it leaves your skin revitalized.  I use the Body Shop Tea Tree Clearing Toner, this is also good for sensitive skin.


Step 3: MOISTURIZE

It's important to moisturize once a day, everyday, no matter what skin type you have to keep your skin hydrated.  For oily skin, it's best to use a oil free moisturizer so it won't clog your pores.  I use the Olay Fresh Long Live Moisture, I like this product because it has a satin finish so I don't find it greasy on my skin.


Step 4: SUNBLOCK

Protect your skin from the sun, use a sunscreen with an SPF 15 during the cold season and SPF 30 or up for the warm weather months to prevent anti-aging and discoloration.  I've been using the Neutrogena Age Shield Face SPF 55.


Step 5: EXFOLIATE

It's important to exfoliate twice a week to remove build up of dead skin cells allowing new cells to be exposed which will make your skin looking healthier.  I use the St. Ives Fresh Skin Apricot Scrub.  Again, this product nourishes my skin, and it helped my skin to have a clearer complexion and it's also affordable.


Step 6: REVITALIZE YOUR SKIN AT NIGHT

Applying a night cream with glycolic acid restores your skin and provides enough hydration while you sleep.  I've been using the Reversa Corrective Night Cream with 4% glycolic acid, this has been recommended to me by a professional esthetician.  This has exfoliating properties which reduces the appearance of brown spots.


Step 7: FACIAL TREATMENT

I think this is worth an investment in return of having a radiant and smoother complexion, and an even-toned skin.  Having a facial every 4-6 weeks helps remove toxins and dirt accumulated in your skin for weeks, months or years.  I regularly place a visit to Abby, an esthetician at Total Wrapture for an hour and a half of steaming and needle-based extractions.  It may seem painful but it's not as bad as it sounds, it's very relaxing since I know I'm in a good hands, thanks to her, my complexion is now better than ever.

Prone to Acne:

Like I mentioned earlier, I didn't have always the best skin and when I do get breakouts or scars from acne, the only trusted medications that I've been using for ages is Erythromycin and the other product that I just discovered is the Lanelle Cream for Acne.  I love these 2 products and I would recommended it to anyone if you can get your hands on it but the only problem is I purchased these overseas (Philippines).  When I do run low on these, I usually get my friends or relatives to send it to me, it may be quite expensive but it's the only products that worked and still is working for me.  When I do feel that a pimple is about to come out or if it has re-surface on my skin, I would apply one of these product and it won't be as irritating as it use to be, the redness has calm down in a day, and the next morning, it's all gone, that's how amazing it is.  


Although for the people that can't buy the products that I mentioned above and that are in a hunt for  an over the counter medication to treat an acne or brown spots, I consulted a professional (Abby) to suggest some active ingredients that you may want to look for.  Acne benzoyl peroxide, salycylic acid, alpha hydroxy acid (known as glycolic acid) and sulfur.

To lighten brown spots, you should look for something that has vitamin C, hydroquinone (not for pro-long use), tretinoin, arbutin and kojic acid.  She also suggested the Reversa Anti-spot Lightening Cream.


Overall, I've noticed amazing results using these steps and will continue in doing them to get a healthier looking skin.

However, if you have any suggestions or feedback in regards to skin care products that you may have used and found effective, please leave a comment below.

Sunday 5 May 2013

My favs for the month of April

Hello again everyone, I'm back with another post, April just went by so fast, I can't believe it's already May! It's getting nicer and nicer outside, the sun is finally out!

For the month of April, I've accumulated a few favorite beauty products that I've been using and loving day to day.  We'll start with:

Foundations:
1. Top Left: MAC Studio Fix Fluid in NC35 - this is a medium to full coverage.  I use this product when I need to cover up a scar from an acne or blemishes as it is not as visible.

Top Right:  Marcelle BB Cream in Medium.  this is a light to medium coverage.  As we all know, BB creams is a moisturizer, primer and a foundation all in one, which I like if I'm in a rush and need to be out the door.  I usually apply this all over my face then mascara and I'm good to go.  Unlike some BB creams this has a thicker consistency and when it dries it gives a semi-matte finish and controls shine.

Middle: Neutrogena Healthy Skin in 70 Neutral Beige.  this is like a tinted moisturizer.  This gives me a dewy look, very light on my skin and it contains SPF20.


 Blush:

1. Top Left: Cream Blush: L'OREAL Visible Lift in 701 Rose Gold Lift.  I've posted a more detailed review on this.  Basically it gives my cheeks a tint of color with a little bit of shimmer but it is not too over powering.

2. Middle: Powder Blush: Sheriff Professional in 306 Look at Me.  This may look vibrant in the pan but it appears the opposite.  It's a subtle shade more like a bubble gum pink.

3. Bottom: Mineral Blush: The Body Shop in 02 Golden Terracotta.  This is best for sensitive skin, This is like a coral/dark orange finish.  it also creates a natural looking flush of color with shimmer.

Here's a few swatches of the blushes:

The Body Shop Mineral Blush in Golden Terracotta

Sheriff Professional in 306 Look at Me


On my cheeks is the 306 Look at Me


 Bronzer and Contour:

1. Top Left: Charlotte Ronson 3x a Charm in Shoshanna - This is a nice bronzer, there's not that much shimmer, it's more of a matte finish.  This suits medium-dark skin tone. This bronzer gives a sun-kissed look when blended nicely.  To apply a bronzer, you just want to place it where the sun hits your face so that will be on the cheek bones, temples and on your nose.  Since this comes with a blush and a highlighter, the blush is a peachy, coral finish, very pigmented so you don't need as much and just blend, blend, and blend.  The highlighter I don't use at all because I find it chalky.

2. Bottom: MAC Pro Sculpting Cream in Pure Sculpture.   This is a soft tan brown.  This product provides a natural-defined contour.  I use this on the hollows of my cheeks to create the illusion of a slimmer face and on my crease for extra dimension.


Charlotte Ronson in Shoshanna (Bronzer
MAC Pure Sculpture

On my cheeks is the Charlotte Ronson Bronzer in Shoshanna


Eyeshadows/Eyeliner

Here are my top 3 eyeshadows that I've been liking for a natural day time, summery look:

1. Top Left: MAC Pressed Pigment in Beaming - Soft brown with shimmer, I apply this with a MAC 239 Brush and spray it with a MAC Fix Plus and dab it on my lids and it gives a glossy effect. 

2. Top Right corner: MAC Paint Pot in Rubenesque - Gold/Peachy cream finish.

3. L'Oreal Color Infaillible in 034 Pepsy Coral - Nice Peachy/Coral with Gold luminosity with a smooth-velvety finish.

4. Lise Watier Eyeliner in Vert Sarcelle - A deep Teal Green eyeliner.  The texture is soft which makes it easy to blend, it glides smoothly as well.  This is a great pop of color to your eyes.


Lise Watier in Vert Sarcelle


Mascara:

1. Rimmel Scandaleyes Volume Mascara in 003 Extreme Black
As I said before, I'm not born with long, thick eye lashes but with this mascara , it separates my lashes and it adds volume.


 Lips:

All of these lip products are perfect for an everyday look, they're all moisturizing on the lips.  I usually apply a gloss on top to make it last longer.  But the texture is smooth and creamy.

1. Top: Maybelline Color Whisper in Pin up Peach, I like to pair it with MAC Lipglass in Enchantress.

2. Middle: MAC Amplified in Half and Half, I like to pair it with Sally Hansen in Sparkling Nude.
3. Bottom: Revlon Color Burst Lip Butter in Lollipop.


Photo on your left: I'm wearing the Maybelline Color Whisper in Pin up Peach with MAC Enchantress.


Face Brushes:

All of these brushes are soft and it buffs well on your skin to give a flawless finish.  This can be use for liquid, cream and powder foundations, blush and bronzers.

1. Left: Real Techniques Buffing Brush

2. Middle: PUR Minerals Chisel Brush

3. Right: Coming Soon GlamChix Fan Brush


Eyebrushes:

1. Left: Sigma Precision Round P82 - I use this for cream eyeshadows and sometimes concealers.

2. Middle: MAC 239 Brush - I use this for powder eyeshadows and pigments.

3. Right: Sigma E25 - I use this to apply eyeshadows or for blending.


Hair:

L'Oreal Elnett Satin Styling Heat Protection for Straight hair, it says it protects from heat damage up to 230 degrees.  It has a light-fresh scent which I like.


Must Read:

1. Jemma Kidd Make-up Masterclass - basically talks about all aspects of skincare and makeup, different application techniques for natural day time look to evening look for age appropriate.

2. Makeup Makeover Beauty Bible - transformation on different women enhancing their beauty.

3. 1968 Magazine Spring 2013 - Inspirations on creating edgy look, it's more for photoshoots.