Sunday 28 April 2013

Creating a polished look

Hi everyone,

It's been a while since my last post, I've been busy with a few photoshoots and my business partner and I are coming up with a makeup brush line etc... which we're both excited for.

Anyway, today I decided to do more of a step by step makeup look, this is good for daytime like lunch meetings, for work, weekend gatherings etc.  Hope you guys enjoy.


STEP 1: Excuse the photo, this is me without any makeup (before shot), since this is somewhat a tutorial, it's better that I show you in detail of how I do my makeup from beginning to end.  So in this step, I apply a toner first, I use the the Bodyshop Tea Tree Skin Clearing Toner, this is good for blemished skin.  then I moisturize with Olay Long Live Moisture. Since I have an oily skin, I use a primer and the one I'm loving at the moment is the Almay Smart Shade Perfect and Correct Primer, besides the fact that it evens out skin tone it also reduce redness.


STEP 2: I apply my liquid foundation with my PUR Minerals Chisel brush, for this look I use Mac Select Foundation in NC35. 


STEP 3: After applying my foundation, I use a eye brightener for my dark circles, which is the Maybelline Instant Age Rewind Eraser Dark Circles, since it's a brightener, the color has pink in it. then I let that set for a few seconds then I layered it with the Maybelline Instant Age Rewind Eraser Dark Circles in 30 Medium.  For any blemishes on my skin, redness around my nose, I use the Mac Studio Finish Concealer in NW25.  For all these products, I use the Elf All over Eyeshadow brush because it's quite dense but soft which is good for blending.


STEP 4: Below is a photo that shows you how I applied my eyeshadow, the palette I use is the Nudes StudioMakeup what I like about this palette is it comes with an eye primer.  So on the photo below marked as step 1, I primed my lids with the StudioMakeup primer then with an Elf eyeshadow "C" brush I applied the 6th eyeshadow shade from your left (on the photo, it's marked as shade 1) it's like a bronzy, golden brown if you find that this shade  too dark on you, you can use the 3rd eyeshadow from your left (marked on the photo as shade 2), it's like a coppery brown. Then I took my blending brush, Sigma Tapered Blending in E35 to blend any harsh lines.

On the photo, marked step 2, I lined my upper lash line with Mac Smolder, or you can use any black eye liner and smudge it with the eyeshadow brush to have a softer, smoky finish.  

Lastly, on the photo marked  as step 3, I applied the Mac pigment in Rose Gold just in the middle of my  eye lid to create definition.


STEP 5: To define my eyebrows, I use the Joe Brow Powder in Auburn using an Angle brush like the Confidential Angle Brush, if you find that your eyebrows is just all over the place or quite sparse, you can apply a clear brow gel to set it.  For Mascara on my upper lashes, I use the Rimmel Scandal Eyes in 003 Extreme Black, I'm not blessed with long, thick lashes but this mascara really adds volume.  and on my lower lashes, I use the Clinique Bottom Lash Mascara, I love this product as it grasp the tiniest bottom lashes and it doesn't smear at all.


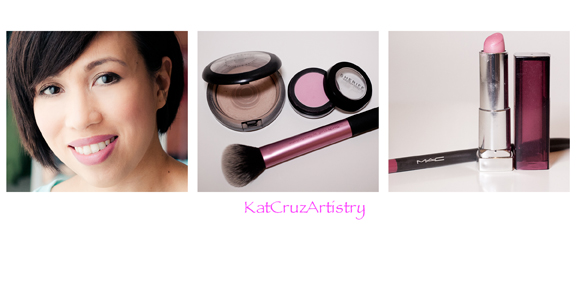
STEP 6: The finish look, I powdered my skin with Mac Mineralize Skin Finish Natural in Medium Plus using the Real Techniques Multi Task Brush, on my cheeks using the same brush, I use Sheriff Professional in 309 Playful (www.sheriffcosmetics.com), as for my lips, I use Mac Pro LongWear lip liner in More to Love ( I think this is a limited edition), you can use any Fuscia, or Rasberry lip liner, and I layered it with the Maybelline Lipstick in 115 Pink Quartz.

I hope this tutorial gave you some idea of how to apply makeup or just to try something new. 


Tuesday 16 April 2013

Olay Professional Pro-X Cleansing System

I have mentioned before that I have oily skin and I use to break out at least once a month and I say I would have 3 breakouts at one point.  I religiously wash my face, exfoliate at least twice a week,  moisturize my skin and apply a post acne treatment but I would still have the same problem.  I wanted to buy the Clarisonic Mia but I was hesitant to shell out $150.  So instead about 3 months ago, I opted for this product,  it cost $34.99 cdn, which is in my price range, but I was thinking will it do the job that it says on the box.  Well, it definitely does, After adding this product to my skin care routine, my skin never felt so clean and smooth and the best part is, I have zero breakouts since I've used this.  I use it twice a day, morning and night.  You can feel that it deeply cleanses your skin.  I did not switch to a different cleanser, I've been using Olay Pore Minimizer Cleanser and Scrub with it. 
I'm completely satisfied with this product.  However, I strongly suggest that when using this product, do not press the brush too hard on the same area as it will aggravate it.  Overall, I would re-purchase this if it does ever breakdown on me.


Monday 15 April 2013

L'OREAL Visible Blush

The texture of these blushes is a mousse, spongy-like, cream to powder finish, similar to the Maybelline's Dream Bouncy Blushes.  I didn't buy all of the shades available because I wanted to try to see if I would like it and if it will compliment my medium skin tone.  The shade that I was drawn to was in Rose Gold, which I find it is lightly pigmented with a sheen of gold to it and it is very easy to blend.  It also illuminates my cheekbones with a look of a healthy radiant glow.  The only downside to it, since I have an oily skin, the product tends to fade after 3-4 hours of use.  The only solution for it, if I layered it with a powder blush then the life span for the product to stay is longer.

I like to apply the blush using my Real Techniques Contour Brush because it's small enough to just touch on the spot where I want it and it distributes the product evenly.

Overall: In my opinion, this blush is nice for an everyday use, especially if you're looking for a flush of colour with an illuminating effect.  The price for an 0.14 oz is quite high for a drugstore, $12.99 cdn.  I would re-purchase this product and try the other shades but maybe when it goes on sale. 


Sunday 14 April 2013

My "Go To" Foundation Brushes

I'm in love with these brushes, the quality are great, the bristles are soft and dense which are ideal for light to full coverage application of liquid, cream to powder and mineral foundation.  These brushes creates a flawless finish.  They're all easy to wash and dries quickly.

From top to bottom:

1. Real Techniques Expert Face Brush - http://realtechniques.com/shop-collection/your-base-flawless/expert-face-brush
2. Sephora Mineral Powder Brush - I also use this for liquid foundation - http://www.sephora.com/classic-mineral-powder-brush-45-P255416?skuId=12005183.
3.Sigma F80 - Flat Kabuki - http://www.sigmabeauty.com/Sigma_Flat_Top_Synthetic_Kabuki_F_80_p/f80.htm
4. Japonesque Duo #120
5. PUR Minerals Liquid Chisel Brush - http://www.purminerals.com/Liquid-Chisel-Brush


Monday 8 April 2013

Clean and Clear Scalp and Hair Therapy

I've been in a hunt for a great shampoo and conditioner for years, and sometimes I'm reluctant to try something new and rely on advertisements saying what they're suppose to be doing because they just don't do much with my thick, frizzy and dry hair. I usually just buy hair masks, or oil that would help improve the look and feel of my hair quite a bit.  However, I heard a few good stuff about the Clean and Clear Scalp and Therapy and decided with finger crossed that hopefully I get my money's worth on this, after one use, I could see and feel the difference, this stuff is amazing, I didn't have to run the water a few times for it to lather, once was enough, unlike the one's I've tried before.  It left my hair smooth, soft and shiny and the scent is mild, it doesn't hurt your nose at all.  After washing my hair and blow drying it, I didn't have to put on any oil or other hair treatment because the result was great.  The price point is also good for a drugstore, I paid $4.99 cdn. for each.  So for any one of you guys who has the same texture like my hair, I definitely recommend this product.  Once you use it, you won't turn back.  There are 7 shampoos and conditioners for women and 6 for men that you can choose from that will best suit your needs.  Here's the link to find more information about the product:


Friday 5 April 2013

Ombre Soufle Supreme by Lise Water-Vert Enchante

I own a few products from the Lise Watier line such as eyeliners, and gloss but not a single eyeshadow, I guess I'm trying to steer away from eyeshadows for a while because I have tons from drugstore brands to high end.  However, I came across this product that I just had to try it.  I got the Vert Enchante, it's like a Green and Silver combo.  The texture is smooth and pigmented, it's a combination of a cream, powder and a foam.  It's a available in 6 beautiful shades, perfect for Spring.  I chose this shade among the 6 because I do like Green but I haven't seen any colour similar to it.  All shades have shimmer to it.  And best of all, the pay off is similar to the Chanel Illusion D'ombre.  This is definitely my favorite by far, I tell you, Lise Watier products has not disappointed me yet.  The only downfall to these eyeshadows is the price, it's $26 cdn, but other than that, it's a good product to have.

To get the look: I apply the Vert Enchante all over the lid then I define it with any peachy, coral eyeshadow on the crease like Paradisco by Mac or if you prefer Brown on the crease, you can opt for Cork by Mac.  I line my upper and lower lash line with Vert Sarcelle by Lise Watier and finish it off with a Black mascara.  


Thursday 4 April 2013

Pur Minerals Liquid Foundation Brush

This makeup brush works wonders for me, a short, flat-topped brush ideal for creating a flawless finish for liquid foundations and cream blush.  The bristles of the brush is dense which allows a greater control for buffing and blending into the skin which gives a less to non-streaking effect.  This is also similar to the MAC 130 with a difference that the handle is shorter than the Mac one which is good for traveling.  It's also cost efficient than the Mac 130, I bought mine for $26 cdn.  This is definitely a must have brush to add on to your collection or to your kit.