It's been a while since my last post, I've been busy with a few photoshoots and my business partner and I are coming up with a makeup brush line etc... which we're both excited for.
Anyway, today I decided to do more of a step by step makeup look, this is good for daytime like lunch meetings, for work, weekend gatherings etc. Hope you guys enjoy.
STEP 1: Excuse the photo, this is me without any makeup (before shot), since this is somewhat a tutorial, it's better that I show you in detail of how I do my makeup from beginning to end. So in this step, I apply a toner first, I use the the Bodyshop Tea Tree Skin Clearing Toner, this is good for blemished skin. then I moisturize with Olay Long Live Moisture. Since I have an oily skin, I use a primer and the one I'm loving at the moment is the Almay Smart Shade Perfect and Correct Primer, besides the fact that it evens out skin tone it also reduce redness.
STEP 2: I apply my liquid foundation with my PUR Minerals Chisel brush, for this look I use Mac Select Foundation in NC35.
STEP 3: After applying my foundation, I use a eye brightener for my dark circles, which is the Maybelline Instant Age Rewind Eraser Dark Circles, since it's a brightener, the color has pink in it. then I let that set for a few seconds then I layered it with the Maybelline Instant Age Rewind Eraser Dark Circles in 30 Medium. For any blemishes on my skin, redness around my nose, I use the Mac Studio Finish Concealer in NW25. For all these products, I use the Elf All over Eyeshadow brush because it's quite dense but soft which is good for blending.
STEP 4: Below is a photo that shows you how I applied my eyeshadow, the palette I use is the Nudes StudioMakeup what I like about this palette is it comes with an eye primer. So on the photo below marked as step 1, I primed my lids with the StudioMakeup primer then with an Elf eyeshadow "C" brush I applied the 6th eyeshadow shade from your left (on the photo, it's marked as shade 1) it's like a bronzy, golden brown if you find that this shade too dark on you, you can use the 3rd eyeshadow from your left (marked on the photo as shade 2), it's like a coppery brown. Then I took my blending brush, Sigma Tapered Blending in E35 to blend any harsh lines.
On the photo, marked step 2, I lined my upper lash line with Mac Smolder, or you can use any black eye liner and smudge it with the eyeshadow brush to have a softer, smoky finish.
Lastly, on the photo marked as step 3, I applied the Mac pigment in Rose Gold just in the middle of my eye lid to create definition.
STEP 5: To define my eyebrows, I use the Joe Brow Powder in Auburn using an Angle brush like the Confidential Angle Brush, if you find that your eyebrows is just all over the place or quite sparse, you can apply a clear brow gel to set it. For Mascara on my upper lashes, I use the Rimmel Scandal Eyes in 003 Extreme Black, I'm not blessed with long, thick lashes but this mascara really adds volume. and on my lower lashes, I use the Clinique Bottom Lash Mascara, I love this product as it grasp the tiniest bottom lashes and it doesn't smear at all.
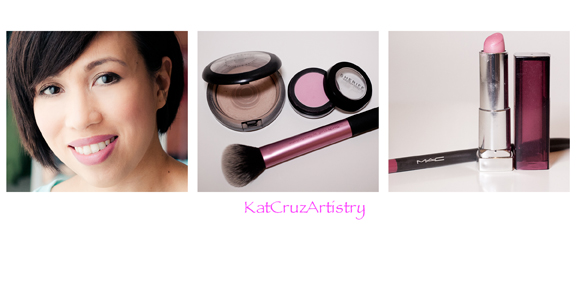
STEP 6: The finish look, I powdered my skin with Mac Mineralize Skin Finish Natural in Medium Plus using the Real Techniques Multi Task Brush, on my cheeks using the same brush, I use Sheriff Professional in 309 Playful (www.sheriffcosmetics.com), as for my lips, I use Mac Pro LongWear lip liner in More to Love ( I think this is a limited edition), you can use any Fuscia, or Rasberry lip liner, and I layered it with the Maybelline Lipstick in 115 Pink Quartz.
I hope this tutorial gave you some idea of how to apply makeup or just to try something new.


No comments:
Post a Comment